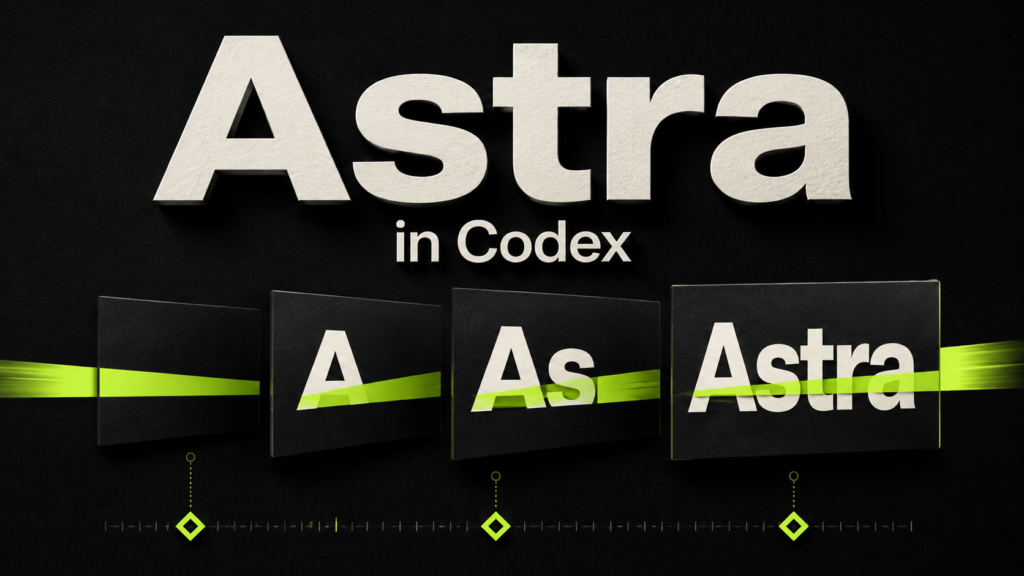
Astra can help you make motion graphics inside Codex: design the composition, write the animation, inspect individual frames, and use a renderer to export an MP4. A useful first project is an eight-second title sequence. Once that works, the same process can produce logo reveals, animated charts, product walkthroughs, and reusable video templates.
The workflow has three parts. Astra makes creative and coding decisions. Codex provides the working environment and tools. HyperFrames or Remotion turns the composition into video. OpenAI lists text as Astra’s model output and documents its coding and tool capabilities in the GPT-6 Astra model reference. The exported video comes from the tools it operates.
This guide uses HyperFrames for the main walkthrough and includes a Remotion alternative. The prompts are copy-and-paste production briefs, with exact text, timing, and deliverables. They have not been validated as a complete set of rendered videos. Technical references were checked on September 4, 2026. The featured image is an AI-generated editorial illustration.
If you are new to the app, start with Kingy’s Codex command guide. Then return here with a local working folder and Astra selected, where it is available to your account.
Choose the framework and the first project
HyperFrames builds video compositions from HTML and supports animation runtimes including GSAP. It is a practical starting point for text, shapes, diagrams, and designed product sequences. Remotion uses React components and a frame number to describe the image at each moment. If you already have a React video project, keeping that stack usually makes more sense than rebuilding it.
For this tutorial, choose a silent, eight-second animation at 1920 × 1080 and 30 frames per second. That gives you 240 frames and a small enough piece to inspect carefully. Text and simple geometry also remove the need to source footage before you can begin.
For photographic scenes, people, or complex environments, you can source or generate footage and combine it with the graphics later. Keep accurate text, logos, and chart labels as separately controlled elements whenever possible; those are the parts you will want to revise precisely.
Prepare Codex, skills, and assets
Open a local folder in Codex. Use an existing video project if you have one, so the agent can inspect its dependencies and rendering commands. Ask for the HyperFrames skills by name. A Codex skill packages instructions, resources, and optional scripts for a particular workflow. Skill availability depends on what is installed in your environment.
Check whether this workspace is ready to make motion graphics with HyperFrames.

Inspect the available skills, Node.js, FFmpeg, browser rendering dependencies, and any existing video project.

Report what is ready, what is missing, and the smallest setup change needed. Check whether local preview and rendering are available.

This is a readiness check. Do not install or update anything yet.
HyperFrames currently requires Node.js 22 or later and FFmpeg for local rendering. Its quickstart documents the skills installer and environment check below. Run the installer only if you need those skills; an existing installation does not need to be recreated for each video. Commands using npx may download software if it is absent.
npx skills add heygen-com/hyperframes
npx hyperframes doctor
Before a branded project, supply the actual logo, exact copy, brand colors, available fonts, and any screenshots or data. An SVG logo is useful because it stays sharp as it scales. A visual reference is more helpful when you explain what to borrow: typography, spacing, color, pacing, or the way transitions connect scenes.
Use the attached reference for its large typography, generous spacing, and restrained movement.

Use our supplied logo and colors. Make entrances quicker than the reference, then give each phrase a clear reading hold.

Preserve the exact headline. You may decide the supporting geometry, transition direction, and easing.
The complete starter prompt: Astra in Codex
Paste this into Codex with Astra selected. It authorizes local creation and rendering, defines the required files, and gives the animation a clear timeline. If a dependency or permission is missing, Codex should identify that specific blocker.
Use the installed HyperFrames skills to create and render an eight-second motion graphic introducing Astra in Codex.

Create the project inside a new folder named astra-motion.

Exact copy:
"Astra"
"in Codex"
"Turn ideas into motion."

Output:
- 1920 × 1080.
- 30 fps.
- Exactly 8 seconds: 240 frames.
- Silent, opaque MP4.
- Editable source project.

Design:
- Background: #111111.
- Main text: #F4F1EA.
- Accent: #B8FF65.
- Use an available bold sans-serif font.
- Large typography with generous spacing.
- Keep essential content at least 100 pixels from the edges.

Choreography:
0.0–1.2 seconds:
A thin green horizontal line expands from the center. It becomes the lower boundary of a mask revealing "Astra".

1.2–2.5 seconds:
"in Codex" appears beneath Astra with a short upward movement. Keep Astra as the dominant element.

2.5–5.5 seconds:
The green line travels across the composition and reveals "Turn ideas into motion." Arrange the final composition so all three lines feel connected.

5.5–8.0 seconds:
Complete all movement and hold the final composition.

Use controlled deceleration and crisp masked reveals.

I authorize creating and editing this local project and rendering it locally. Use the available dependencies. Explain the specific scope of any missing installation or permission.

Make routine design decisions yourself and state assumptions.

Build the animation and run the relevant framework checks. Inspect the opening, transitions, and actual final frame. Render the MP4 locally and verify dimensions, frame rate, frame count, duration, and absence of audio.

Deliver the video, editable source, one preview image, and brief instructions for changing the copy and rendering again.
The key creative decision is the green line. It starts the composition, acts as a reveal boundary, and connects the final phrase to the title. Giving one element a job across several beats helps the piece feel coherent.
A hold is part of the animation. The final 2.5 seconds give the viewer time to absorb the message after everything settles. If the ending feels slow, inspect the copy length and preceding movement before shortening that reading time.
At 30 fps, an eight-second video contains frames 0 through 239. The final frame is sampled at approximately 7.967 seconds. Checking only a screenshot at exactly 8.0 seconds can miss the actual last rendered image.
Give Astra decisions it can execute
“Make it premium” can lead to almost any design. A better instruction names the visible choices: one type family, generous margins, restrained color, short masked reveals, and a controlled settle. “Make it energetic” becomes useful when you specify fast entrances followed by readable holds.
A strong brief covers the audience, the message, exact copy, visual direction, motion, timing, and delivery. Separate requirements from decisions the agent can make. Preserve your logo and headline; let Astra choose an accent shape or the direction of a transition.
Create a 12-second motion graphic for freelance designers.

Message: A clear brief makes the first draft easier to build.

Exact copy:
"Start with a clear brief."
"Build with a direction."

Required:
- Preserve the exact copy.
- Use black, warm white, and one orange accent.
- Hold the final message for at least 2 seconds.
- Deliver a 1920 × 1080, 30 fps MP4 and editable source.

You may decide:
- The supporting geometry.
- The transition direction.
- One-line or two-line headline layout.
- The precise easing.

Make the movement communicate the shift from scattered ideas to an organized composition. Build, inspect, and render locally.
For longer work, split creative selection from implementation. Choose the idea before investing in detailed animation. A representative still frame can expose weak typography or cramped spacing while they are inexpensive to change.
Develop three distinct directions for a 20-second motion graphic about [topic] for [audience].

For each direction, describe the central visual idea, typography, palette, opening image, signature movement, timed sequence, and required assets.

Make the directions meaningfully different. Recommend one based on clarity and audience fit.

Stop after the concepts. Do not implement yet.
Develop direction 2 into a representative still frame using the actual copy and supplied assets.
Show the main explanatory moment with finished typography, palette, and hierarchy. Save the design decisions with the project.
Deliver the frame for review.Once you select the frame, ask Codex to implement the timed composition using that visual basis. Request a working preview if you want another checkpoint, or authorize local rendering in the same prompt when the direction is settled.
Six specific motion-graphics prompts
These briefs use different visual problems. Replace bracketed information before sending. Each can produce a local video once the required tools and assets are available.
1. Kinetic typography that expresses a change
Use HyperFrames to create and render a ten-second kinetic typography video.

Exact copy:
"Too many moving parts."
"One clear direction."

Format: 1080 × 1920, 30 fps, silent MP4.
Design: warm white background, near-black bold text, cobalt accent.

0–4 seconds:
Reveal the first phrase. Let individual words move along short, competing paths while preserving at least 1.5 seconds of readable hold.

4–7.5 seconds:
Align the words and supporting rectangles along one shared vertical axis. Make this alignment the main visual event. Reveal the second phrase and settle the composition.

7.5–10 seconds:
Hold the final phrase fully readable.

Make the motion express a shift from disorder to coordination. Inspect at phone-sized playback, render locally, and deliver the editable source.
2. A product demo with a fictional interface
Create and render a 12-second HyperFrames product animation for a fictional task app called Orbit.

Label the interface "Demo workspace".
Output: 1920 × 1080, 30 fps, silent MP4 and editable source.

Design: off-white background, dark navy text, rounded interface panels, restrained shadows, one orange accent.

Build three columns:
"To do", "In progress", and "Done".

0–3 seconds:
Reveal the interface with a card reading "Write the brief" in To do.

3–6 seconds:
Move the card into In progress. Show the cursor arriving before the action.

6–9 seconds:
Move the card into Done and reveal a small completion indicator.

9–12 seconds:
Reframe the interface to make room for "Keep work moving."

Keep controls readable at video size. Give each action one clear focal point. Inspect the transitions and exported MP4.
3. A chart with a clear numerical point
Create and render an eight-second animated comparison chart in HyperFrames.

This is fictional demonstration data.
Title: "Completed projects"
Before: 18
After: 27
Supporting statement: "50% increase"
Persistent label: "Illustrative data"

Output: 1920 × 1080, 30 fps, silent MP4.
Design: charcoal background, white labels, gray Before bar, teal After bar.

0–2 seconds: Reveal the title and grow the Before bar to 18.
2–4 seconds: Grow the After bar to 27.
4–5.5 seconds: Reveal "50% increase" with one short emphasis.
5.5–8 seconds: Hold the complete chart.

Use a shared zero baseline and proportional bar heights. Keep labels stationary after reveal. Verify the values and percentage. Render locally and deliver the editable project.
The “Illustrative data” label matters. A demonstration chart should not look like an unqualified business claim. For real data, supply the source and units, and ask the agent to verify the arithmetic before it animates the result.
4. A reveal built around your logo
Use the attached logo to create and render a six-second brand reveal in HyperFrames.

Inspect the logo first. Choose one line, shape, or alignment within it to motivate the motion.

Preserve the final logo's geometry, proportions, and colors.

0–1 second: Introduce the chosen geometric motif.
1–3.5 seconds: Use it to reveal the complete logo.
3.5–6 seconds: Hold the logo with the tagline [YOUR TAGLINE].

Use restrained motion and precise final alignment.

Deliver a 1920 × 1080, 30 fps MP4 and editable source. If the installed renderer supports an appropriate alpha export, also deliver a transparent version.

Render locally and verify the transparent version over light and dark backgrounds. Report any export limitation accurately.
5. A lower third for a tutorial
Create and render a six-second transparent lower third with HyperFrames.

Name: [YOUR NAME]
Title: [YOUR TITLE]
Canvas: 1920 × 1080, 30 fps.

Place the graphic near the lower left with a 100-pixel inset. Use a compact dark text panel, warm white type, and one lime accent line.

0–0.5 seconds: Enter with a short horizontal reveal.
0.5–5.5 seconds: Hold both lines fully readable.
5.5–6 seconds: Exit cleanly.

Export using an alpha-capable format supported by the renderer and suitable for [YOUR VIDEO EDITOR]. Also provide an opaque MP4 preview.

Verify compositing over light and dark footage. Deliver the editable source.
6. A seamless geometric loop
Create and render a six-second seamless loop in HyperFrames using three geometric shapes.

Output: 1080 × 1080, 30 fps, silent MP4 and editable source.
Palette: charcoal, cream, and lime green.

Animate a repeating exchange of position and scale. Keep a clear visual rhythm and generous spacing.

Design position, appearance, and movement to remain continuous across the loop boundary. Keep the source composition finite and renderable.

Inspect the exported clip repeated three times to check the seam. Correct a visible jump or unwanted pause before delivery.
Revise by timestamp, element, and effect
Specific feedback protects the design decisions that already work. Identify the time, the element, and the intended change. If the headline arrives too early, explain which reading hold needs more time. If the motion feels playful, name the bounce or overshoot you want removed.
At 0:03.2, the headline and chart compete for attention.

Let the chart finish first, then reveal the headline 0.4 seconds later. Recover that time from the decorative movement near the end.

Keep the total duration unchanged. Inspect and re-render the affected sequence locally.
The final title overshoots and feels too bouncy.
Remove the overshoot and use a smooth deceleration. Reach the final position by 0:06 and hold it until the end.
Keep the current copy, typeface, colors, and output format.The supporting text is difficult to read at phone size.
Increase its size, shorten the line length, and rebalance the spacing. Preserve the headline as the main focal point.
Inspect the result at a small playback size before rendering again.For a broader review, limit the revision to problems that affect the viewing experience. That keeps an agent from repeatedly changing a finished piece to satisfy minor preferences.
Review the current motion graphic for readability, visual hierarchy, and whether movement helps communicate the message.

Identify the three most significant defects, if present. Make one focused revision pass using concrete changes to timing, spacing, scale, or movement.

Keep the agreed copy, duration, format, and brand assets. Verify the affected moments, render locally, and explain what changed.

Stop when the material defects are resolved.
Make the animation reliable to render
A video renderer can request a frame directly. The composition must produce the correct image at that time even when earlier frames have never played. This is why a browser animation that looks good during ordinary playback can still fail during export.
HyperFrames describes its approach as seek-driven rendering. The requested frame determines the animation state; assets and output settings are established before capture. Wall-clock timing, unseeded randomness, or assets fetched halfway through a render can make the result inconsistent.
Make the composition deterministic and seekable.

Every requested frame must produce the correct visual state without depending on previous playback. Use the framework's supported animation and media timing.

Load required fonts and assets before capture. Keep the duration finite. Use seeded randomness if randomness is needed.

Inspect several frames out of chronological order to confirm that seeking produces the correct result.
Preview speed and export correctness are different questions. A heavy composition can stutter during real-time playback while still exporting correctly frame by frame. Compare a rendered sample with the preview before deciding that the animation itself needs rewriting.
Preview and export commands
Codex can run these commands for you. They are included so you can recognize the stages and rerun a finished project. Follow any existing project wrapper scripts and inspect the installed CLI help when its version differs.
The HyperFrames CLI documentation covers creating and operating projects. Create a new project with:
npx hyperframes init astra-motion --non-interactive --example blankRun subsequent commands from that project directory. During development, lint catches structural issues. The current final check already runs lint before its browser checks, so an immediately preceding lint run is generally redundant. See the CLI development workflow.
npx hyperframes lint
npx hyperframes check
Open Studio for review, then render after you have authorized the local export:
npx hyperframes preview --background
npx hyperframes render --quality high --fps 30 --output renders/final.mp4
Use the actual preview URL returned by the command. Its port can differ from an example. For a particular composition file, use the -c option:
npx hyperframes render -c compositions/intro.html --output renders/intro.mp4In the current CLI, the positional render argument is a project directory. The -c option identifies a composition file. The preview and render reference documents these flags. Set the intended canvas in the composition; changing its aspect ratio later requires checking the layout again.
Specify audio and transparency deliberately
An opaque MP4 is a straightforward first delivery. An overlay needs an alpha channel in the exported file. A transparent background in the source is only part of the job: the codec and pixel format must preserve it.
For editing, ProRes 4444 in MOV is one common alpha-capable choice. WebM can carry alpha for compatible browser workflows. The extension alone does not prove transparency. Remotion documents the relevant combinations in its transparent video guide; use the equivalent supported settings in your chosen renderer and inspect the output.
For a narrated explainer, settle the script and voice recording before finalizing visual timing. A rewritten sentence can shift every beat that follows it. For music-driven work, provide the track and identify whether you want specific events aligned to musical accents.
Use the supplied narration as the timing source.

Map spoken phrases to visual beats, then animate diagrams and keywords around those beats. Keep on-screen text brief enough to support the speech.

Include captions, check their timing, and inspect the final exported audio for clipping, abrupt cuts, and synchronization.
If you want generated voices, music, or photographic footage, specify the service and authorize any paid generation or upload it requires. A request to render a local text animation does not inherently require those services.
Use Remotion when your project is built in React
Remotion uses compositions with explicit dimensions, frame rate, and duration in frames. Animation can depend on the current frame, and content can be supplied through props. Its official agent skills support Codex workflows.
Use Remotion and its installed skills for this project.

Inspect the existing setup first. Create a composition named TutorialIntro at 1920 × 1080, 30 fps, and 240 frames.

Use this creative brief:
[PASTE COPY, VISUAL DIRECTION, AND TIMED BEATS]

Drive animation from the current frame using supported Remotion patterns. Make the copy and colors editable through props. Load fonts and assets reliably.

Build the preview, inspect representative frames, render an MP4 locally, and verify the exported result.

Deliver the React source and document the render command.
Once that project and composition exist, the documented CLI pattern is:
npx remotion render TutorialIntroYou can append an output path to choose the destination. See Remotion’s rendering guide. Choose the framework explicitly when you have a preference, so the agent does not spend effort setting up a different stack.
Reuse the design and adapt the format
A finished composition becomes more valuable when its copy, colors, and assets can change independently of its motion. Ask for a small set of editable values and practical content limits. Test the longest headline you expect to use, because a template that handles two words can fail with eight.
Turn this finished composition into a reusable template.

Expose the headline, supporting text, accent color, logo asset, numeric value and unit, and final CTA where those elements exist.

Keep content separate from animation logic. Document practical limits, including headline length and supported chart items.

Verify a short-text example and a long-text example. Keep the existing finished version available.
Landscape, portrait, and square exports need separate layout decisions. Type sizes, grouping, and line breaks often need to change even when the timing stays the same.
Adapt the finished motion graphic into three local MP4 exports:
- Landscape: 1920 × 1080.
- Portrait: 1080 × 1920.
- Square: 1080 × 1080.

Keep the current frame rate, duration, copy, and visual identity.

Recompose each canvas: adjust line breaks, reposition supporting elements, maintain readable type sizes, preserve each beat's focal point, and keep essential content away from the edges.

Inspect each version independently. Render locally and verify dimensions, duration, transitions, and final hold. Deliver clearly named videos and editable source.
Check the exported file before calling it finished
A successful command confirms that a process ended. You still need to know whether the result matches the brief. Still frames reveal clipping and alignment problems; playback reveals pacing; metadata establishes the delivery format. Ask the agent to report the checks it performed.
Verify the exported video against the brief.

Check dimensions, frame rate, intended duration, and frame count where exact timing is required. Confirm the correct text, numbers, logos, and fonts.

Inspect the opening, transition frames, and actual last frame for blank images, clipping, or collisions. Check reading time at normal playback.

Check audio synchronization and ending if audio is present. Check alpha compositing if transparency is required.

Play the exported file when the tools support it. Report what was actually checked and any material limitation.

Deliver the finished video, editable project, preview image, and instructions for changing the content and rendering again.
If a render is blank, ask Codex to inspect the entry composition, timeline registration, clip timing, and asset-loading errors. If fonts change during export, ask it to verify font loading before capture. If the result pauses at a loop boundary, inspect the last-to-first transition and its movement continuity.
When Codex pauses unexpectedly, ask it to identify the exact missing information, permission, or instruction and complete any independent work already authorized. OpenAI’s Astra prompting guidance discusses follow-through, verification scope, and the effect of instructions in skills and project files.
For your first attempt, use the eight-second Astra prompt above. Review the exported video once, note any material problems by timestamp, and make a focused revision. Keep the source alongside the final MP4 so the next title, color change, or format adaptation starts from a working project.
The Kingy Brief
Get The Kingy Brief.
AI changes, original tests and one practical thing to try. Fridays at 09:00 Vancouver time.
Free · Double opt-in · Unsubscribe anytime
Sign up for The Kingy Brief on Beehiiv.
Signup help and newsletter schedule
Signup form provided by Beehiiv. After submitting, check your inbox for "Confirm your subscription to The Kingy Brief" and open its confirmation link. Check Spam or Promotions if you cannot find it.
Fridays at 09:00 Vancouver time: source-checked AI changes, original tests and one practical thing to try. We skip a week when there is not enough verified material. Free. Unsubscribe anytime.